This post may contain affiliate links. Please read my disclosure for more info.
Time to Complete - 30 minutes
Difficulty - 3/5
Tools and Parts Required
- Ratchet
- 10mm Socket
- Phillips head screw driver
- Penetrating Oil
- Copper anti-seize
Disclaimer: Any information given in this guide is to be used at the readers own risk. I take no responsibility for injuries to the reader or damage to their vehicles. If this guide is followed correctly, no harm should occur to either the reader or the car.
Please read through the entirety of this guide prior to undertaking any work, and take due care.
How to Remove and Refit a Rover 25 or MG ZR Front Bumper
Please note, prior to starting this guide, you will need to remove the front fog lights and remove the indicators.
Step 0 - Spray Fixings with Penetrating Fluid
Most of the fixings you need to undo to remove the front bumper are subject to the weather, road salt and general road grime so, inevitably, you're gonna come up against that one screw that's rusted up solid and just won't budge, or shear in half like mine...
To try and avoid as much swearing as possible, read through this guide and then liberally spray all of the fixings on the underside, and at the sides, with penetrating fluid at least 10 minutes before you start.
Just a heads up, standard WD-40 is not a penetrating fluid, however, they do sell a specific penetrating fluid called WD-40 Specialist Fast Release Penetrant that you can pick up on Amazon for less than £10. Grab a can by clicking the previous link or the image below.

Step 1 - Remove the Outer Screws at the Bottom of the Bumper
At the bottom of the bumper there should be three screws either side. Remove all three using your Phillips head screw driver.
Step 2 - Remove the Inner Screws at the Bottom of the Bumper
Still working underneath the car, there are three bolts in the middle of the bumper that need to be removed. This will require the ratchet and 10mm socket. They are highlighted in the image below for clarity.
Step 3 - Remove the Outer Bolts Securing the Bumper to the Wing (Fender)
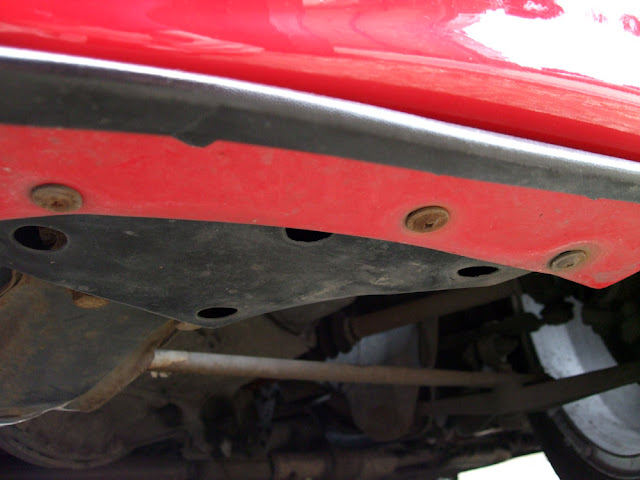
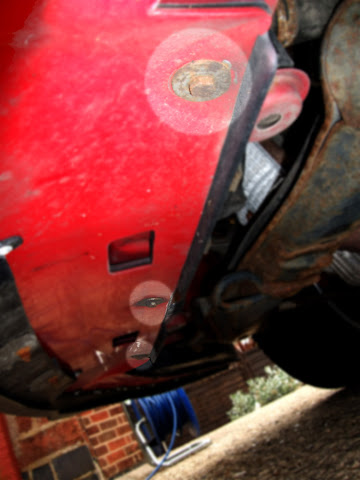
Moving to the sides of the bumper now (two bolts both sides), there are two bolts securing the bumper to each wing (fender).To access these bolts, pull back the wheel arch lining and look towards the front of the car.
In the image below you need to remove the nearest and farthest bolt from the camera, leaving the middle one.
Again this requires the 10mm socket. Be careful, these are the bolts that sheared on my car, as you can see they were pretty rusty.

Step 4 - Remove the Fixings Under the Bonnet (Hood)
Lastly open the bonnet (hood) and remove the four bolts and two nuts attaching it to the car frame.There is one bolt at either end (picture 1 below), two very close to the bonnet release latch (picture 2 below), and two black nuts roughly in between the bolts one of which is near the moulded logo of the fog light and 1.1% text (picture 3 below).
All the fixings for one side are shown below, their positions are mirrored on the other side. They will all require the 10mm socket to remove.


Step 5 - Lift Off the Front Bumper
Having removed all the screws, nuts and bolts the front bumper should now simply lift off the car.When the bumper has been removed the car will look something like this.

Note: You don't need to remove your headlights to remove the front bumper, at the time mine were removed so I could upgrade the Rover 25 headlights with silver internals for the MG ZR headlights with black internals.
Step 6 - Refitting the Front Bumper
Refitting the bumper is just a case of following steps 1 - 5 in reverse.I'd highly recommend using an anti-seize product, like Comma Copper Ease when replacing your fixings. It has extreme temperature tolerance (-40°C to +1150°C), forms a dense protective coating over metal parts and will not wash or burn off, so no more sheared fixings if you need to remove your bumper in future!
It also comes in handy when replacing your brake pads, you can avoid brake squeal by applying it to the back of your new pads. Get yourself a tub from Amazon by clicking the link above or the image below.


5 Comments
How the hell did you remove the 2 bolts at step 3 without breaking them? Snapped all 4 of them today.
ReplyDeleteI actually didn't, they snapped on mine too. Unfortunately that area is prone to rust. I replaced the bolts and cleaned the area up when I refitted the bumper.
ReplyDeleteBuilders band - the metal strip with punched holes - can be improvised to replace the bar with the snapped bolts. The band I used had holes which lined up and I used some roofing bolts with their thin square nuts tightened onto the building band to replace the broken bolts. Use hex head nuts to fix onto wing and bumper and generous amounts of grease on the square nuts and threads to help stop rusting.
ReplyDeleteThe part number for the brackets that the bolts are attached to is DPP100960. The nuts are not included. You can get them from Rimmer Bros, Lincoln.
ReplyDeleteHello,
ReplyDeleteI have to replace my right headlight and i'm having problems with the bumper. I can;t get the 4 side bolts loose. The metal bracket is already rusted and has broken. How can i get them loose ? I am afraid to use brute force since i am scared that the whole things is going to fall apart.
And another question, what size are those bolts and is there any alternative to that metal bracket until i can order one?
Thank you.
Post a Comment
Let me know what you think by leaving a comment below.